Showing posts with label Kazmer. Show all posts

Saturday, June 19, 2010

Copper Cuff

This is a piece i had a lot of fun making. It was a lot of work but I will be making more of these type of copper cuffs.


I was reading Suzan Lenart Kazmer's book, looking through the chapter about hinges. I decided it was time to make a small bezel, with a hinged lid on top. Why not make this into a cuff? So very fun!
After cutting, filing, and soldering the bezel, it was time for the lid. I decided to use metal with a special kind of patina. After searching through my stash, i found a scrap that had once been part of an old broken doorknob.

The doorknob was cheap for about a dollar at a local scrap place! After MUCH fighting with it, i managed to tear it apart and flatten piece by piece of the pretty pretty metal it was from. It was quite 'damaged' (ie beautiful texture!) by the time i was done... not sure i'd reccomend this to another as it was a lot of work for little gain. Still, this was one of the pieces i'd gained here, and i do enjoy the texture and patina it lends to the piece.

After hinging the lid to the bezel, it was time to form the cuff. First i textured the copper by banging on it with the round end of a hammer, leaving it with almost a rough polka dot pattern i enjoyed. After forming it around my wrist (wow a wrist manderel would be nice... that was a hard job) I curled the two ends under.

Soldering time again! I soldered the bezel to the cuff... but the solder went everywhere! I think i heated it too long so the solder spread past the flux. Unfortunate, but i do still love it.

The closure on the back is a piece of brass, hinged again with a hinge from Kazmer's book Cold Connections. Very very fun, instructive book!

Finally, time to fill the bezel. A pretty little star and some resin, and it's finished! The resin did sadly spill out from the bezel as it clumsily got bumped and
knocked over while curing. I got most of it off, but there are some oddly shiny spots left still. Still... part of the charm?

Hope you enjoy my runthrough of what i did to create this favorite piece of mine... trials and errors included :)

Sunday, May 23, 2010

Thorny Rose

Looking at my blog here, it looks like I haven't been doing much at all! Really though, i've been keeping pretty regular with my jewelry making, just hadn't been taking any pictures. The camera was slowly dying, so we decided to get a new one.


Much better...

I'll be honest... I made this cuff months ago, back in March. However, the pictures have now finally been taken, propperly cropped and photoshopped, and it's time to start showing things here on my blog again!

This piece was made using Stephanie Lee's book, Semiprecious Salvage. This was the first jewelry book i ever made, and i am slowly but surely working my way through every project in the book. I'm about halfway through, as i have a bunch of other books i am interspersing the projects with. This is the project for her wire-wrapped bangle.

The focal here is a paper rose, held in with tabs, discussed in Suzan Lenart Kazmer's Cold Connections book. Techniques from both Kazmer and Lee blended into one piece... wow do they play well together :).

Other things happening: I got my first jewelry saw last week. So far, just practicing how to make straight lines, curved lines, and turn corners. No blades snapped... (yet!). Found an excellent tutorial on the Lapidary Journal Jewelry Artist site. I have been enjoying their newsletters so much that i just subscribed to the magazine today... hoping to love it as much as the tutorials on the site! Def worth checking them out, for both the tutorial and the rest of the site as well.

Wednesday, November 25, 2009

I made my own nails


I feel kinda proud about this one. See those four pieces of metal? That used to be simple 16 gage copper wire. I annealed and patinated it, hammered on the top to form a head, and used my metal file to sharpen the bottom part. I may still use my metal files to clean up the groves left by the C-clamp (i don't have a vise). I got the general technique from Kazmer's book 'Cold Connections'... again. I really do love that book.

But here is the dilemma... now that i've made them what on earth will i do with them? An assemblage project of some kind? I dunno... I guess i'll just wait for the inspiration to strike. I really like the mint-tin style assemblage with the nails sticking out on the edges. Maybe a strange, strange christmas ornament? hahah.

I have also created the start of four bezels. Still unsure what to put in them too. They have been cut and filed, and are ready for me to torch solder them this weekend. Can't wait. The one of them is really deep... need to find something with more weight and presence to put in that one. They will also be a chance for me to try out my new ice resin!

Looking for nail-y inspiration...

Monday, November 23, 2009

Christmas present arrived!

Colour me impressed.... Objects and Elements was able to ship a box of stuff to me out in South Korea in only 1 week. I was so excited to come home and see a box waiting for me on the kitchen counter.... At first I assumed it was the presents my friend Tasha had sent me (she made me an awesome corset/arm-band/hair piece set that i can't wait to recieve), but it turned out to be my christmas present from my honey!

Ryan and I sat down last monday and picked out our christmas presents from each other online last monday. He picked a load of books off amazon, I picked a litter of interesting stuff off the Objects and Elements blog. Check out my loot in the picture above!!!!

First, I picked the Liver of Sulfer. I knew i wanted taht going in, as i have been experimenting with patinating metals, especially copper. I love the feel and working with copper, but i am not wild about always having that same bright red colour that just doesn't always seem to match everything. It's nice to work with some new colours in the metal mix sometimes. I have been working with my blow torch, now it is the time to step this up to the next level. I know i need to be very careful with this stuff... Don't worry i'll be carefully reading up on this all over before attempting use.

On a less chemical scale, but no less exciting for me, i then immediately picked up the metal punch alphabet. I have been wanting one of these for so long.... I couldn't resist trying it out immediately. The punched piece was just made earlier this evening. So easy!!! I just love the level of personalization available here. Can't wait to create my first piece with a great quote.

I also picked up a sheet of bronze, as seen on the bottom of the picture. The gage is so wonderfully thick. I was expecting it to have a more rusty kind of colour, but find the colouring to be fairly similar to that of copper. Still, it doesn't have as intense of that red tone.... this could be very interesting. Can't wait to play with it and my blow torch this weekend!

I picked up some of the cog wheel shaped pendants here, seemed like fun things to use for a steampunk style piece. I do love the idea of creating in the steampunk style. Just need to really jump in with that one.

Last, but not least, maybe if you squint really hard and use a bit of imagination you'll be able to see the Ice resin i also purchased. After hearing so much raving about it, I thought i'd give it a try. I then promptly forgot to put the bottles in the photograph! Sigh. Typical of me lol. Still, that i think will be more intersting once i start creating with it.

I now have the makings of some great bronze bezels.... and good resin to put in it too! Very exciting.... stay tuned for eventual pictures :)


All things said and done, i would call my shopping experience with Objects and Elements a total success! I really love my metal punch set, and all that remains is to check out their 'signature product', the ice resin! Very exciting...

Saturday, July 18, 2009

Burried treasure collaboration

*** This post is my submission for the 'Buried Treasure' collaborative project posted by Seth at The Altered Page. I am sorry that it is a day late :s. The object of this is to look back and re:post one of your favourite old entries. I really liked this one because not only did I show pictures of projects i was working on, i discussed two books i had been reading as well. Hope everyone has a fantastic day!***

Books! (the title of the post)

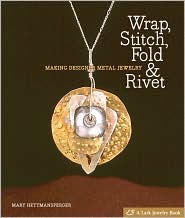
For Christmas, my boyfriend and I each picked out out own presents off amazon. He himself is quite the bibliophile, and I really wanted a couple of books. I got myself Mary Hettmansperger's book 'Wrap, Stitch, Fold & Rivet' and Susan Lenart Kazmer's 'Making Connections: A Handbook of Cold Joins for Jewlers and Mixed-Media Artists'.


I would highly recomend either one of these books, as I am immensely enjoying the both of them. I am loving the ideas and style of Susan's book. It is very found-object focused with STUNNING pictures of projects she has created. Turning bottle caps into bezels, how to create funky trapezes to dangle objects from, pictures of mini-lightbulbs with little paper messages inside... what's not to love? I just wish I had been able to take my 'found object' art supplies with me here to Seoul. I have a whole bunch of stuff sitting in Canada that would be great for this kind of thing but i had to leave my stash behind (but safely tucked away in storage!).

I also am loving the project based aproach in Mary's book. There are many techniques discussed at the beginning of the book and then it turns to project creation. I unfortunately lack many of the tools needed for both books. I sadly still don't have an anvil, a dapping block, or a torch :(. Give me time... and a good hardware store... Mary seems to have a strong following for her book, as I have seen many of these projects being discussed on blogs and such. I am looking forward to getting started, but am still in the material and idea gathering phase for her first project of a 'spinner necklace'.

However, I have created a couple necklaces that use ideas discussed in the technique sections. Mary's book discusses how to create these swirls and pound them flat. Lacking an anvil, i am ashamed to admit i have been using a hard ruler and a towel.... sigh. However, the wire was fairly soft and it worked fairly well for this! This necklace was created while practicing how to make these fun swirls discussed in her book.

Sunday, May 24, 2009

Mary Hettmansperger Challenge

Deryn Mentock is hosting a challenge on her lovely blog, Something Sublime, where she challenges us to create projects with Marry Hettmansperger's lovely book, Wrap, Stitch, Fold & Rivet. I created the first project a while back, but have definately been neglectful and fallen behind on my blog here. Today I finished my second project from the book, and wanted to get this up before i fall further behind. At the rate i was going, the contest would be over before I put my projects up!


This i call my 'Tree of all Seasons', based on the first project in the book 'Stacked Spinner Necklace'. It took me a bit to get started on this necklace, as i was unsure of how i wanted to procede. The idea of creating the stacked necklace is so open... there were so many different directions i could go! However, i eventually made a stac starting with a flat tree pendant, followed by etched copper, then a leaf form, ending with a textured rectangular piece of copper. My kindergarten students looked at it and told me it was my seasons necklace. The bare tree was spring, the flowered copper for winter, the falling leaf for fall and the blank sheet for winter. Sometimes the words of children are the ones that mean the most.


t
a

This second piece I call 'Blue Folds', loosely based on her 'folded earings' project number two. I liked the idea of working with copper, but i don't yet have a blowtorch so i was unable to do the project quite as she discussed. Instead of focusing on my torching skills, i focused more on riveting skills that' i've been learning from my Kazmer book. I liked the way the metal was wrapped around the beads, but i went a different direction after the initial inspiration. As opposed to drawing a bead on the wire, i riveted the end of the wire. I then strung the beads on, and then created the loop on top of the brass. I am quite pleased with how these turned out.

My only dilema now is what to do with these. I love jewelry, but i don't have pierced ears! I can't wear these myself, as i do with all the necklaces and bracelets i make. Maybe i'll have a giveaway later? Maybe these will help celebrate 4000 views to my blog later on? Or maybe i'll use it for a birthday present later? I am still deciding on this one. Any suggestions?

Friday, May 15, 2009

Fabric and Lace

My jury is still out on this piece, but i thought i'd post it anyways. This necklace i called 'fabric and lace'... for rather obvious reasons i think lol. I was inspired, as usual, by the lovely work of Nina Bagley, as seen in this post. I just loved the homespum feel created here by the lovely buttons. What a wonderful way to attach fabric to chain! I createda similar type of thing, but then went in a bit of a different direction with my piece here.


I feel that this necklace has the most rustic feel of all my pieces. It has fraying edges, chunky knots and visible hand stitching on the fabric everywehre. I think i am still getting used to it?

GPP Street Team's theme this month for their monthly challenge is 'make it your own'. In their discussions of how to do this, they talk about taking manufactured (and also non-manufactured) materials and infusing them with your artistic signature through methods such as sanding, painting, etc. In this it reminded me a LOT of what i'm reading inn Suzan Lennart Kazmer's book. Also, they talk about using the inspiration of others, yet 'making it your own'. I could enter this into this, but as i find pretty much all my pieces start inspired by others, i think i'll enter one i like a bit better... I feel like i just missed the mark a little on this one. Any suggestions?

Saturday, April 18, 2009

Fabric Nest, and questions about inspiration.

I have really been enjoying the posts on the blog of Nina Bagley lately, on her blog
Ornamental. In this crazy city i live in, it is nice to see that there is a bit of peace out there in the world. As well, Nina makes some of the most beautiful nature inspired jewelry i've ever seen.

Is it bad that when i saw her lovely lovely nest necklace, and couldn't resist trying to make a fabric nest of my own? I was simply so inspired by her that i couldn't help it... the fingers just started reaching for the lace, needle and thread of their own volition. What is the protocol on this exactly? I will definately list her as the inspiration for the necklace, and let her know. I am slightly torn on this, and am wondering what you think out there. On the one hand, I did not copy the entire necklace, just the general idea and then pieced together something of my own ideas from hers. On the other hand, she is a professional artist who earns her living by these designs. I love how genereous she is sharing her lovely designs on her blog. It would be different if this was published in a book (which she is more than talented enough to write!), or in a magazine where she is putting it out there for public inspiration. On the other hand, a blog can be something like this as well... when we put things out here they are officially out in public and anyone can see them. Hmmm.... it is a question i am mulling over in my mind. Any ideas you guys have about this would be greatly appreciated, pro or con.

To be perfectly clear, this necklace is only for my own personal usage (i love it too much to give it away and i am not at the level where i'm ready to sell on etsy just yet). I'll also be sending her a note letting her know how inspiring her blog really is to me, especially that necklace. If i were selling things, this would be a different story altogether.


Without further ado, this is what i created.


I created this fabric nest by first sewing together a long line of different laces, then wrapping them around the wired beads so the different layers show. This is a necklace that BEGS to be touched... the next is very textural. Some of the lace, and also the lace i tied in a knot on the side, is a beautiful gift from one of the street sellers in Dongdaemun. The store specializes in handmade lace for wedding dresses, and when i tried to buy a half meter of it, she said that was too short and gave it to me for free instead. I loved it, and bought a couple other laces there too. Although they did not fit, I have been thinking of making a lacy Marie Antoinette-style choker with varied laces... could be fun.

The acorn was a gift from my mother when i last saw her in canada, which she'd found on the ground. How special, to have an acorn my mother found me in my grandmother's garden... it just adds to the specialness of the necklace for me. The join is a 'trapeeze join', which i learned in Kazmer's book Making Connections.... (i swear the book is amazing). It allows the acorn to spin around it's wire, and swing freely. The chain is from Dongdaemun, as usual.

Hope everyone is having a lovely weekend.

Sunday, March 29, 2009

Green Lightbulbs

I've been reading Suzan Lennart Kazmer's book 'Making Connections' and have just been loving it. I love looking at the pictures of pieces she has created. I was especially fascinated by her use of mini lightbulbs with messages inside. However, i am still not familliar enough with Seoul to find these on my own, as hardware stores are seeming to be especially elusive.


Still, what did i find on my walk to the cab from the flower market, a couple weeks ago, but a discarded strand of beautiful green mini-lights! I was so stoked. I swear, after starting to make art i find that i've been watching the ground as i walk to not miss any 'treasures'. My man just sort of shakes his head, but i get so excited each time i find something interesting. I was so excited about these little green lightbulbs.


I had made a trip to Dongdaemun (the GIGANTIC market here in Seoul where you can buy pretty much anything... if you know where to look ... which i don't). I picked up a lovely varied selection of green beads, chain, and these cool long stick looking beads too. I wrapped the lightbulb bases in the wire and then attached them to the wire and wired on all the beads. The finished result is quite a long necklace... i am really pleased with how it tured out. The lightbulbs are such an interesting touch, i find.

I had initially planned to 'Kazmerize' them (as i believe the phrase has been coined), and give them some rust, or a collaged message, or just a little extra 'something', but then decided i liked them there just the way they were.

My kindergarten are baffled seeing lightbulbs on my necklace, but they are now getting used to seeing so much odd stuff on my necklaces that are not 'korean' that they've chalked it up to me being canadian. I think they think all Canadians wear necklaces like this hahahha.