Saturday, June 28, 2008

Glass box and a dilema

I don't think my friend Fletcher reads this blog, but you can never be too careful. It is Fletcher's birthday coming up, and i wanted to try making him something. I've been playing around with the idea of working with soldering and glass. (Collette, I truly appreciated your comment on the previous post. It got me thinking that it was time to try again). I have yet to feel 100% successful on any of my soldering and glass projects. I was happy with the last one until the solder around the jump ring snapped. I need a way to make that stronger. However, i decided it was time to try again, as this is a rather difficult technique that takes practice to perfect.

I was looking again through Sally Jean Alexander's 'Pretty Little Things' (my ultimate source of ideas for glass) and was intrigued by her glass box. I decided to try making one myself.


Fletcher, if you are reading this... please stop here.


So, here is my box i made. I carefully measured 5 squares of glass and one of mirror 1.5 inch square. I notice that Sally says in her book to use 2mm thick glass. Mine is at least 5. However, i will just work with what i have (the 2mm prob would have been better for this though). I cut the copper tape so it wasn't so wide, so that the visible glass would have a larger surface area. I then taped the edges of each piece, and then taped the pieces together in the shape. I left the lid off for now. Last, i soldered it all together.

Now i have a dilemma. What will i put in this box? Any suggestions of what i could put in here for a present for my male friend? Hmmmm...

Saturday, June 21, 2008

Posting second project


Here are some pics of the second project here. I am pleased with how some parts came out, especially the photo manipulation, but not so pleased with other parts such as the stencil and stamping.

So, i used a variety of techniques on this piece, that i crossed off on the previous quote. I really liked the way it turned out with the different inks on the piano keys. Sparkle sparke :)

I'm not so pleased with how it turned out with the stencils. I made stencils myself. I liked the way that it turned out on paper, but it turned out sort of messy on the photo and the gel medium. Sigh.

So, two projects down, i'm not sure how many more to go. We will see i guess :). I still have 10 days to go... that's one third of the month.

Wednesday, June 18, 2008

Status of the challenge

The challenge is going pretty good so far. I am working on the finishing touches on the second piece. I find that this is more difficult to create my own projects using the techniques discusses, rather than following more of a recipe book type formula, where you create the projects they discuss.

So, we're at about half way through the month and i'm no where near done... but i guess you could say i'm close to half way :) The bolded techniques are the ones i've already done in the first two projects. I will post the second project when it is done, as i am still putting on some finishing touches.


1. Oil paint*
2. Finger painting
3. Impasto*
4. Soft Tones
5. Acrylics

6. Pigment Paint*
7. Stamp in oil
8. Watercolour crayons *
9. Oil Pastels

10. Markers
11. Walnut ink * (anyone know where to find this?
12. Gesso
13. Ink
14. Notch Tool *
15. Crackle Paste *
16. Molding Paste *
17. Gel Medium
18. Sanding
19. Crumple
20. Wax
21. Emboss
22. Velum
23. Transparency
24. Stucco *
25. Hand Carved Stamping
26. Milk Stamp
27. Bleach stamp
28. Bubble Wrap
29. Stencil
30. Fabric
31. Handmade Paper
32. Embossed Paper
33. Cardboard
34. Tape
35. Salt or Sand
36. Tissue/Newspaper
37. Rust/Patina *
38. Mosaic
39. Organza
40. Transfer
41. Text
42. Rub on
43. Draw/Sketch

Friday, June 06, 2008

Two finished things

So far, the challenge to complete every technique in 'Mixed Emulsions' goes well. I have decided the best way of doing this is to create a series of pieces using photographs, each one using a variety of the techniques discussed. I have finished my first piece, Lilacs.


In Lilacs, I tried out many of the techniques discussed in the book. I used: soft tones, watercolour paints, wax, decorative paper, text, finger painting and corrugated cardboard. Seven down, thirty six more to go.

I really like how this turned out. I like the ties between the warm beeswax smell and the smell the lilacs would have. I picked up a piece of beeswax at the farmer's market, and dripped it around the altered photo, melting it with my soldering iron. This was my first time working with wax. I am generally happy with how it turned out considering that it was a first effort, but i know that i still have a long way to go before i become proficient with wax.

The second project i finished off today is the collage house created for Hannah, for the give-away as the 1000th viewer of my blog. Thanks again to everyone that has been visiting me here... i love seeing all the comments that you all leave me.

I created this house with cardboard as a base. The cardboard was gessoed and then painted. After scratching up the paint, I nailed the two pieces together with small golden nails. The 12 (Hannah's house number) was rubbed onto the top. I glued a piece of word art 'Keys to the past' to the metal door piece i picked up at a restoration store in town, and glued on a small key. And voila! C'est tout fini! All done, I will mail it to Hannah in Sweden tomorrow.

Tuesday, June 03, 2008

Huge challenge... accepted? I'll try my best :)

So, Jen Worden does a challenge on her blog once a month. This one is a doosy! The challenge is to get a book (one of those project art books) and do EVERY project in the book! I am so excited! You aren't really supposed to buy a new book on this one, but i just couldn't resist the excuse of buying myself another... this is now my third I've bought, though i have borrowed many of them from the library.


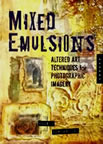
The book i chose isn't really a true project book, although it is a how-to art book. It more teaches techniques rather than specific projects, although it sort of has some of those too. I chose Angela Cartwright's book 'Mixed Emulsions'.

So as i already said, this book does not have a list of projects per say, it is more a list of techniques. So,my plan is to make projects, trying out EVERY technique that is listed in the book. I am hoping that this is close enough to the challenge... but the challenge seems pretty loose. It's more about trying things out. I think the spirit of the challenge is to sit down and really try out everything there is do do in one of the books, to use it to it's fullest. Without further ado, this is the list of techniques discussed in the book, and i am going to try to use all these photo altering techniques within the next month! (Wish me luck!)

*I will need to buy some supplies, the stars indicate the ones i need to go shopping for

1. Oil paint*
2. Finger painting
3. Impasto*
4. Soft Tones
5. Acrylics
6. Pigment Paint*
7. Stamp in oil
8. Watercolour crayons *
9. Oil Pastels
10. Markers
11. Walnut ink * (anyone know where to find this?
12. Gesso
13. Ink
14. Notch Tool *
15. Crackle Paste *
16. Molding Paste *
17. Gel Medium
18. Sanding
19. Crumple
20. Wax
21. Emboss
22. Velum
23. Transparency
24. Stucco *
25. Hand Carved Stamping
26. Milk Stamp
27. Bleach stamp
28. Bubble Wrap
29. Stencil
30. Fabric
31. Handmade Paper
32. Embossed Paper
33. Cardboard
34. Tape
35. Salt or Sand
36. Tissue/Newspaper
37. Rust/Patina *
38. Mosaic
39. Organza
40. Transfer
41. Text
42. Rub on
43. Draw/Sketch

While it is true that there are 43 different techniques here, more than one technique can be combined in one project. All of these techniques are smaller parts of a bigger project... some cannot even stand on their own.

Wish me luck! I'll be editing this post as i go, showing my progress by putting x's beside each one :).