Showing posts with label mixed media projects. Show all posts

Tuesday, August 02, 2011

Searching Necklace

Recently, Objects and Elements website posted a tutorial about riveting domed metal to a flat surface. How serendipitous, I was just starting up a piece where I'd be doing this! Here is my submission to this challenge. The larger found metal piece was somewhat domes already. I used the method discussed to refine the curve, and riveted using a wire rivet strengthened by a brass tube.

This piece, 'Searching' was made with lots of found metal pieces. I think the top one is from some kind of audio equipment? No idea what the bottom once was... any ideas out there? Other found pieces include a round piece, and also a lens from a friend's broken camera. It works pretty cool as both a necklace and a mini magnifying lens.


Saturday, October 10, 2009

Etsy Metal Challenge

There is a challenge blog I've found that is from various metal artists on Etsy. An amazingly talented group of jewelry artists joined as participants for a challenge that follows Project Runway's weekly challenges. Each week, they challenge themselves to create something following the theme of the week's show.

I was intrigued last week, where the challenge was to create a piece of movie jewelry in a movie genre. I chose Science Fiction for myself, and started to work on a piece in more of a narrative jewelry in a narrative with industrial (dare i say steampunk?) style. However, the piece was big and i didn't even get halfway done before the week's limit.

Luckily, the next week's challenge was to create something in blue. As i hadn't yet added any color and had just been working with metal, the change of all colored pieces to blue was an easy one. So, the plan was to have this as a guest submission to go with the others.

This plan very sadly didn't work out as i was 3 HOURS LATE!!! for the submission deadline. I had planned to work on it friday night (korea time) in order to finish by the deadline but then went to a jazz festival instead of finishing the piece(still worth it). sigh. Maybe next week i'll be on time? I'll be leaving a quick comment on the post saying that I finished the challenge but was too late.

I thought i'd post this piece anyways, as it is finished and photographed. Also, it's been a LONG while (almost a month!) since I last updated and I knew I needed to get on posting this or it would be just set aside.


As I mentioned, this is a narrative piece of jewelry. When I was designing for the movie challenge, I decided that this would be for a girl who had been part of a royal family. Her family were murdered by her evil aunt, but the girl managed to escape (kind of like Anastasia?). The girl ran off, and pretended to be a boy. She lived with a blacksmith family for a while, but was found out. She managed to escape again, but the blacksmith family was sadly killed. The girl, who has grown into a woman, swears revenge on her aunt.

I'm not sure this is really a sci-fi movie, but it isn't really historical fiction either.... It almost has some elements of an adult fairy tale type movie?? I don't know where it really fits. Still, each element of the necklace has an element of the movie within. The two tear shaped blue dangles are for her parents. The key was to her old bedroom. The picture is of her mother. The three iron pieces are for the blacksmith family. Lastly, the scraps of blue fabric are from her aunt's dress, to remind her of her purpose.

I had a lot of fun making this piece, and definately learned a lot too! Not quite sure what I will do with it, as it isn't exactly the standard type of piece people wear out on the street or to work, but I'm not your usual korean on the street here anyways! Maybe I'll wear it out and about anyways, and love the looks that it draws.

Monday, November 24, 2008

Resin tips and a fabulous link

First i'd like to put out a thanks to the lovely Carmi. She really came through for me last post, when I asked about what to do when your resin does not cure propperly.

I thought I'd throw out there what I have learned myself so far about working with resin, as I didn't really find a sastisfactory answer on the internet before Carmi came along.

1)The humidity of the air affects the curing of the resin. I had done work with resin before, but it dried outside on a hot, dry summer day. This time, it cured in my basement. I found large differences with results between the two (the dry air being the better result).

2)In order to remove the bubbles forming in the resin, use a bbq lighter and wave the flame back and forth over the surface. The heat causes the bubbles to go away.

3)The amount of hardening agent in relation to the amount of resin is very important. If there is not enough hardening agent, the resin will not cure propperly.

4)Be very careful when working with resin. It is extreemely difficult (impossible?) to clean off if your resin drips on your a) table, b) hands, c) jeans, d) mistaken parts of your project. (Unfortunately, resin dripped on all four for me. Luckily, the jeans were old and already ruined when dripped India Ink).

5)Resin makes a really neat coating on top of paper. I used the leftover resin from remaking my charm and coated two backgrounds for ATCs that i'd made... it dried really neat and shiny, as if the piece was made from plastic. Well worth trying :).

6)Sometimes, after you mix resin, it goes CLOUDY! I don't know why this happened. Any commenters out there that can answer this, i will edit the answer in here.

7)Don't glue resin charms onto the main piece until you are CERTAIN that they have cured properly.

8)If there are small scratches on the surface of your resin, you can sand it or add another coat of resin to smooth it out. ( I haven't tried this one myself yet, but this is what i read on a blog)

So, as you can see, I definately learned some positive things and some negative things about working with resin. I decided to follow Carmi's advice with the previous embelishment i had been working on, and just add another layer of resin that would hopefully cure propperly. It was clear when i mixed it, but when i looked at it again about 5 minutes later, it had gone quite cloudy! I tried washing it out, hoping it would get out the resin (where i learned lesson #4 lol). This did not work at all. I had to pull off the charm, which wrecked the paint. I therefor had to re-prime, re-paint and make a new charm for the piece. I have created a new charm now that I think I like even better, and all that remains is for me to screw it onto the main piece. I'll post this once it's finished. Good think Erin isn't around to pick it up yet!


I'd like to mention a fabulous project that I was linked to at Amber Dawn's blog. They are selling this beautiful necklace, done as a collaborative project, to raise funds for breast cancer. WAY TO GO, LADIES! Not only is the necklace absolutely stunning, I love how the money goes to such a great cause.


Edited afterwards:

Thank you so much to Amber Dawn for her fabulous comment she left! She left a comment on the post two previous to this one, with her tips about working with resin. Her advice here is fabulous, and I just had to add it to the post here so everyone could else noticed it too! It was too good to just sit in the comment section...

Here it is:

"Always mix the resin and hardener 1:1
or 2:2
Always the same of each not more hardener.
As for the cloudiness, your image could be bleeding into the resin.
A way to prevent this is to seal the print outs and art work with package tape. Place package tape on BOTH sides of your paper burnish it.
OR you can seal it with clear sealer stuff.
I personally find that rubbing alcohol works VERY well at getting resin off of my hands and work surfaces.
Just work on wax paper over more paper, like old newspapers and you are good to go!
When mixing your resin, stir slowly. Don't use a paint brush or painted stick.
You can use wooden or plastic swizzel sticks.
I use a flat surface to mix my resin and scrape the resin back and forth to mix it. Credit card offers or old credit cards snipped into smaller sections are PERFECT for doing this!

Doing it fast causes cloudiness or big bubbles.
ALWAYS use good ventilation.
I damaged my organs/kidneys years back because I didn't know that an open window wasn't good enough. I also got a lot on my skin!
Now I use a fan which pulls the air out of the window, and I have another window open to create cross ventilation. ALWAYS ALWAYS WEAR GLOVES!
Dale, I am sorry your project didn't work out.
But the learnig process is FUN!
Best wishes!
Amber Dawn (Think Pink) "


What gems of information! Thanks Amber for all of that. I know for myself, I think it answered the question of why my resin went cloudy. While i did use a clean bamboo skewer for stirring, i stirred it quite quickly, and in a 'stirring' motion, definately not a pushing motion. I think that was my problem. Good to know... i'd have done that the next time too!

Monday, November 17, 2008

Present finished

I've been having a highly enjoyable weekend. Friday night, I went out with a friend i don't get to see very often, and we watched 'Burn After Reading'. Wow... i would highly recomend this movie to pretty much anyone, as long as you can handle movies with rather mysterious endings (this one didn't really have an ending at all, but it was perfect that way). I also saw Zach and Miri Make a Porno... it was unexpectadly endeering and cute.


I finished a nice case for the bracelet i made for my friend Erin. Here are some pics. I just felt like the bracelet was so tiny it made a little fragile puddle... it needed a case to hold it in (you can see the bracelet on it's own in the previous post. The case was created with a matchbox tin. I gessoed and painted it, drilled holes, wired it to a rusty washer on the top and a etched copper butterfly on the bottom. Glued onto it is a bottle cap, with a picture of a butterfly and the stamped word 'fly'. I really like how this piece turned out :). I hope Erin likes it.

I have a dilema... There is a workshop here in regina on wednesday evening about altering photos for artistic purposes, but wednesdays are also jazz band practices... I am so torn! Should i be off playing my trombone at practice, being responsible and such, or should i play hooky and go to the workshop??? hmmmm... i will see how i am feeling on wednesday.

Tuesday, July 22, 2008

Back to ATCs

So, I received an e-mail saying that a gallery in Vancouver is holding an ATC exhibition, and they are calling for submissions. Although i will not be able to attend, it still seems pretty neat. I love trading in new ways. I will be sending 9 ATCs to the Richmond art gallery by August 22nd. They are asking for the submissions to be along the themes of things like domestic life and such. You can find more info about it here.

So, i've been creating more atc's lately. There is a swap on saturday in a nearby town that i'll be going to... this should be fun. I have to buckle down and create some cards for trading before saturday. I really like how Secret Glen turned out.

Here's two i've finished. The first is for the exhibition, and the second is for the swap on sunday.


I have finished the second jewelry project from Stephanie Lee's book Semi-Precious Salvage. I'll be posting it tomorrow, or soon. Time to move on to the third :). However, i think my ATC making may take precedence over it for this week.

Thursday, July 10, 2008

New Challenge... for myself :)


It's here! It's here! I just got a call a couple days ago from my local bookstore, saying that my copy i'd ordered in of Semi-Precious Salvage, by Stephanie Lee had arrived. As soon as i picked it up and flipped through, i knew it was the next step for me. I already fell in love with Stephanie's sense of style and beautiful art jewelry on her blog... now it was time to start following some of her projects. I immediately flipped to the first project and checked it out... gorgeous as expected. I scanned through the list of things i would need to create this, and saw that all i was missing was 24 gauge wire, a brayer (which i ended up not buying.... just couldn't find one i really liked! I need to find a brayer at some store that i can bond with...haha) and metal files... that is very reasonable for price! Everything else, i already had. I love it when things work out that way... :)


So here are the pictures of the first piece i created from this book. I deviated slightly from the instructions... prefering the hammered copper look over a stamp of white acrylic paint and only able (and prefering?) the gold wire over black. I skimped on the pearls and used these gorgeously smooth green beads i had instead. As well, instead of making this a brooch (in which i'd probably never wear it) i made this into a necklace pendant instead. Other than that i stuck pretty much to the instructions. Jewelry creation is rather new to me, but i am so very pleased on how this turned out.


I am creating a new potential challenge for myself... i want to try working my way through the projects in this book. This is very similar to Jen's challenge of last month, but i am not happy with teh book i picked... it was way too many techniques and lacked specific projects to work on. My other book is still a valuable book to have about photo altering techniques, and i did create two projects (i loved the lilac one, and the keyboard one turned out okay), but it is not quite the 'start from the start and work to the end' type of book. I am giving myself a personal challenge to work on this one.

I am also working on another birthday present. I have a friend who adores unicorns, and i'm making her an art shrine. I had the perfect little matchbox, and found an adorable plastic unicorn at the dollar store. I'll post you some pictures when it's done.

Saturday, June 21, 2008

Posting second project


Here are some pics of the second project here. I am pleased with how some parts came out, especially the photo manipulation, but not so pleased with other parts such as the stencil and stamping.

So, i used a variety of techniques on this piece, that i crossed off on the previous quote. I really liked the way it turned out with the different inks on the piano keys. Sparkle sparke :)

I'm not so pleased with how it turned out with the stencils. I made stencils myself. I liked the way that it turned out on paper, but it turned out sort of messy on the photo and the gel medium. Sigh.

So, two projects down, i'm not sure how many more to go. We will see i guess :). I still have 10 days to go... that's one third of the month.

Friday, June 06, 2008

Two finished things

So far, the challenge to complete every technique in 'Mixed Emulsions' goes well. I have decided the best way of doing this is to create a series of pieces using photographs, each one using a variety of the techniques discussed. I have finished my first piece, Lilacs.


In Lilacs, I tried out many of the techniques discussed in the book. I used: soft tones, watercolour paints, wax, decorative paper, text, finger painting and corrugated cardboard. Seven down, thirty six more to go.

I really like how this turned out. I like the ties between the warm beeswax smell and the smell the lilacs would have. I picked up a piece of beeswax at the farmer's market, and dripped it around the altered photo, melting it with my soldering iron. This was my first time working with wax. I am generally happy with how it turned out considering that it was a first effort, but i know that i still have a long way to go before i become proficient with wax.

The second project i finished off today is the collage house created for Hannah, for the give-away as the 1000th viewer of my blog. Thanks again to everyone that has been visiting me here... i love seeing all the comments that you all leave me.

I created this house with cardboard as a base. The cardboard was gessoed and then painted. After scratching up the paint, I nailed the two pieces together with small golden nails. The 12 (Hannah's house number) was rubbed onto the top. I glued a piece of word art 'Keys to the past' to the metal door piece i picked up at a restoration store in town, and glued on a small key. And voila! C'est tout fini! All done, I will mail it to Hannah in Sweden tomorrow.

Tuesday, June 03, 2008

Huge challenge... accepted? I'll try my best :)

So, Jen Worden does a challenge on her blog once a month. This one is a doosy! The challenge is to get a book (one of those project art books) and do EVERY project in the book! I am so excited! You aren't really supposed to buy a new book on this one, but i just couldn't resist the excuse of buying myself another... this is now my third I've bought, though i have borrowed many of them from the library.


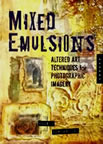
The book i chose isn't really a true project book, although it is a how-to art book. It more teaches techniques rather than specific projects, although it sort of has some of those too. I chose Angela Cartwright's book 'Mixed Emulsions'.

So as i already said, this book does not have a list of projects per say, it is more a list of techniques. So,my plan is to make projects, trying out EVERY technique that is listed in the book. I am hoping that this is close enough to the challenge... but the challenge seems pretty loose. It's more about trying things out. I think the spirit of the challenge is to sit down and really try out everything there is do do in one of the books, to use it to it's fullest. Without further ado, this is the list of techniques discussed in the book, and i am going to try to use all these photo altering techniques within the next month! (Wish me luck!)

*I will need to buy some supplies, the stars indicate the ones i need to go shopping for

1. Oil paint*
2. Finger painting
3. Impasto*
4. Soft Tones
5. Acrylics
6. Pigment Paint*
7. Stamp in oil
8. Watercolour crayons *
9. Oil Pastels
10. Markers
11. Walnut ink * (anyone know where to find this?
12. Gesso
13. Ink
14. Notch Tool *
15. Crackle Paste *
16. Molding Paste *
17. Gel Medium
18. Sanding
19. Crumple
20. Wax
21. Emboss
22. Velum
23. Transparency
24. Stucco *
25. Hand Carved Stamping
26. Milk Stamp
27. Bleach stamp
28. Bubble Wrap
29. Stencil
30. Fabric
31. Handmade Paper
32. Embossed Paper
33. Cardboard
34. Tape
35. Salt or Sand
36. Tissue/Newspaper
37. Rust/Patina *
38. Mosaic
39. Organza
40. Transfer
41. Text
42. Rub on
43. Draw/Sketch

While it is true that there are 43 different techniques here, more than one technique can be combined in one project. All of these techniques are smaller parts of a bigger project... some cannot even stand on their own.

Wish me luck! I'll be editing this post as i go, showing my progress by putting x's beside each one :).

Friday, May 09, 2008

Collage Houses

This is my second post of three, all from the same day. I figured i'd separate them by topic instead of having one long, overwhelming post for my readers haha.

I decided it may be fun to open a cloth paper scissors magazine to a random page and see what it turns up. Well, i was in luck and my random magazine opening fell upon Sue Pelletier's fabulous collage houses project (in the jan/feb 2008 magazine). I really loved the houses that she created. I was facinated by the odd pieces that she used, such as rusty metal door pieces, odd nuts and bolts, vintage game pieces and much more. I would highly recommend checking out Sue Pelletier's collage houses if you have this year's jan/feb issue of cloth paper scissors. It is worth another look!

So, i started by finding some thick cardboard. Cut it into rectangles and triangles, and then gessoed them on one side. (Is gessoed even a word? My spell check tells me no... i guess it is for now hahaha.) I then painted one a patchy variety of greens, and the other with red-brown-coppers. I love monochromatic pieces. I'm not sure what colour i would call the theme for the second one... brown probably. However, it is loosely monocromatic for the second one. I gel mediumed them together, and the pic features where they are at for the moment.

I still need to add a coloured glaze over each piece to unify the colours, and then scrape, scratch and sand up the surface. After that i will solidify their bond and decorate them with small rusty nails and who knows where it will go from there? Bring on the odd pieces! I just picked up a bunch of stuff from a garage sale today (see prev. post) but i think they're all too big.

Wednesday, March 19, 2008

First large work finished!!!


This is an accomplishment for me... i have just recently finished my first art piece that was larger than an ATC! Just a couple days ago, i finished a mixed media piece that was 8 by 8 inches :).

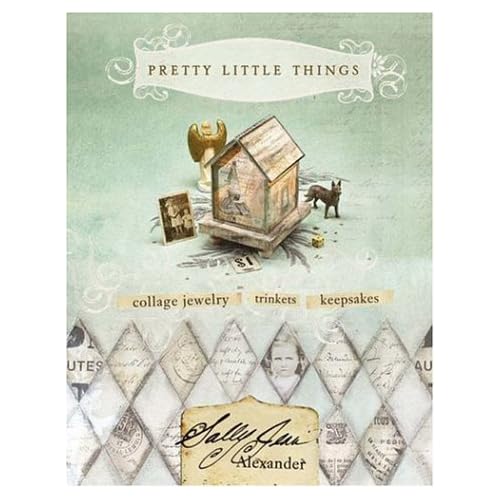
I just recently got hold of Sally Jean Alexander's book "Pretty Little Things". I am really enjoying her work. I am slowly working my way through, savoring each page as i go. So far, i have especially enjoyed her discussion of a collage creation technique. In this, she said to have 10 different techniques ready at hand. You then choose techniques at random from these 10, and do them in the order chosen.

So, for this, my 10 techniques i chose were slightly different than the ones she suggested. Mine were: acrylic, ink, oil pastel, sandpaper, collaged text, collaged image (photo, clipped etc), collaged paper, charcoal, watercolour and glaze. I cut a piece of watercolour paper to an 8 by 8 size. I then wrote all 10 techniques on a journaling page. I chose the techniques using the 'close your eyes and point' method.

Here is the order i ended up with:

1. Stamp (added faces and umbrella stamps)
2. Ink (splattered blue ink all over bg, didn't like how it turned out)
3. Acrylic (added a variety of colour spots in the background, added brown around face and three umbrella stamps. Didn't like colour spots)
4. Acrylic (painted over colour spots with a dark teal colour, much better in my mind)
5. Ink (used india ink to make lines and outlines on the page)
6. Glaze (added glaze of blue over green in bg
7. Oil pastel (added brown colour splotch)
8. Oil pastel (added word 'rain?' on brown splotch)
9. Text (ripped and glued paper frame around umbrella stamp)
10. Watercolour (added blue colour in white spots on canvas where stamps are.


So, there you have it. My first (somewhat) larger piece. I'm not saying it's huge or anything, it's only 8". But for me, that's a big step in the right direction :).

I'm not sure i would use this technique as a regular means of creating art, what with the media usage being so random. I don't like the way that you can't really plan as effectively where you are going with the piece, in some ways it somewhat distances you. However, as an exercise for playing with how different media go together, i find it perfect. The options for different media are endless. You could do this with a larger photo bg, and use things like 'bleach' or 'sand' and such instead of other methods. Although i do feel it distances you from your art and lessens the possibilities for both planning and creativity, it is also an enjoyable way of creating art where there is less pressure of the 'blank canvas' and less wondering what to do.

Wouldn't it be fun to try something like this, where a bunch of people make a collaborative list of different techniques/media and create art in this way for a swap or even simply a challenge? I'd love to try something like this. Maybe i will host something like this here on my blog? I wonder what kind of response i'd get? :) I think i'll just throw the idea out there now, and if you would be interested in something like this drop me a quick comment or something. :) If you are interested, would you want to do this as a challenge, with a prize for the a random participator, with maybe something small for each person who participates? Or would you prefer to have this as a swap, where we trade art? Let me know what you are thinking.

Come on, don't be shy :) :) :) I don't bite.... hard....

Wednesday, March 12, 2008

Post number three

This is the third (or first, from your perspective on the blog order) post for today, since i had a huge amount of things to talk about and just decided it would be better to split it up into three posts of focused topics. I finally have time to get caught up here on my blog, since i had the afternoon off work today (no subbing needed this afternoon :) ). Relaxing, blogging and art fun for me this afternoon instead of work!!


A couple posts ago i promised to post pics of the journal i finished off for a Swapbot swap. This journal is the pictures you see along side this post. I was to alter a journal, adding a cover and a number of inside pages but leaving most of it blank for the recipient to use as they deem fit. After a number of failed attempts at other ideas, i decided to have a collage type, Roy Lichtenstein themed journal for them. For the front and back cover, i first collaged strips of newspaper. I then used a water slide transfer of squares of Lichtenstein's art. The back cover, i added a wash of gold ink under the transfer.

On the inside, i collaged strips of ripped velum onto cardstock. I then pasted a print of a Lichtenstein piece on each cardstock piece.

I really hope that the recipient enjoys my journal i made then :). I can't wait to recieve mine from the swap.

Tuesday, February 26, 2008

More projects

Well, i went to studio sundays. That really was a let-down. As it turns out, the facilitator who told me about the program failed to mention that the 'general public' isn't allowed into the real studio area, just the entrance room. As well, the program is geared towards young children, complete with planned crafts, controlled activities and even storytime. So... totally not what i'm looking for.

Oh well, i've still been keeping busy with many different projects. I swear, it's probably better that i don't have that new thing to take on, as i at this moment have signed up for a journal swap due next weekend and owe 3 people ATC's. Wow.... things do pile up when you're having fun! I love it.

Previously, i talked about the Altered Journal Swap that i signed up for (link goes to the post). I have now been to Staples (FAR better than wal-mart for this hands down) and picked up the journal. I have decided to try to keep a cohesive theme for the journal. Each page and the covers will be collaged with newspaper strips. The covers will have additional details that i have not decided yet. Each inside page will have a block of iridescent ink painted onto the collage, and then on top of that i will put a packing tape transfer of one of their favorite bands cd art, and stamp lyrics from the cd onto the page. I have sent my partner a message, asking about favorite bands. I just hope they aren't all like 'i like 50 cent' or something like that. Not to bash the type of music (although i am most definately not a fan), it just really wouldn't fit with the theme i have going here. Even worse, i hope they aren't all like 'Oh, i don't listen to much music'. I'm sure they won't.... i hope hahaha. Music is such a major part of my life, the concept of someone not listening to music of some kind is completely foreign to me.

I will post pics of my journal progress as it is going along soon. I have already collaged the front and back with newspaper, and i have added papers to the insides of the covers. They are looking great :)

Saturday, February 23, 2008

Finally posting again

My name is Dale, and i am a lazy blogger. It has been a week since my last blog post.

Feels like i'm at an AA meeting or something. BA maybe(bloggers annonymons)? hahaha

I have to admit, i briefly fell of the 'one creative thing every day' wagon. I missed three days of creative this week. And things got busy. As a result, the blog was briefly set aside. But i'm back now.

I have been keeping busy with a number of projects. In the temporary absence of an ATC website home base, i had looked around the net to see what else is out there. I admit, i was mostly fairly disappointed. There wasn't much that really called to me out there for trading websites. Until i found swap-bot.

Swap bot seems to be a website where you trade many different things. ATCs are part of it, but they have other stuff there too. That really interests me to branch out into other areas of altered art. I am especially interested in trying one of their 'matchbox swaps' but unfortunately, the floral one i really wanted to be in was for US only :(. Really... it can't be that expensive to send a tiny matchbox to canada from the US, is it? Oh well. Instead, i signed up for an Altered Journal swap. I uncoil a boughten journal, add some fun pages every 5 or 6 pages or so, add a cover and then mail it away. Someone will do the same for me :). I can't wait to get started. Just need to somehow find an A5 journal.... hahaha. Tried buying one at walmart today but realized that i don't know what size A5 is, and no one there did either.

Been keeping busy on another project. I thought for this one i could keep you posted with pics at each stage. My mother had a really neat mint tin in Carolina, and she gave it to me. I sanded down all the paint off the outside so it was scratched metal, and then proceeded to paint the lid iridescent purple. Here are some pics of how it is turning out so far. I wish i had taken pics of what it was like originally. Oh well, too late now.


My plan for this box is to create sort of like a shrine type thing inside. I have seen many 'shrines' in magazines and on the internet, and i find them facinating. However, i don't fully understand what entails a 'shrine'. It is an odd name for them, since i doubt these have any religious significance. I know mine won't. I was thinking more of a burlesque, can can dancer type theme. Don't know yet, but the lid is painted a vibran, sparkly purple so far. That or a snake sort of theme? I haven'd decided yet. I need to look more into this. Anyone know a good 'shrine' artist, where i can check things out and be inspired?

I have also been creating some ATC's. There is a new site for us created by some ex-mods from ATCards.com. We're now at atcs for all. I am really pleased with the quality of much of the work being uploaded in the gallery there. I already set up a couple of trades.

A definite bummer about the couple days i took off from creating art is that my 'to trade' section of my ATC's is almost empty, and i have my monthly face-to-face swap that i am going to tomorrow! I feel bad going to the swap, and i only have 5 cards for trading. Here are two i just finished off tonight.


This one was inspired by an artist's work i met at the Artist Guild that i just joined. The only mixed media artist there seems to be quite friendly, and she showed me some of her previous work. Some of my favorites were the paper mache tree branches she had bumping out on a winter tree painting. I liked the idea so much i tried it for myself. If i remembered her name i would credit her for her idea, but i have a horrible memory for names so unfortunately she will have to here remain nameless.


I also finished this one tonight. Today i went out, and while at walmart searching for a journal, I found India Ink. I have always been fancinated by the idea of trying it out, and it was fair inexpensive so i bought it. This is my first experimentation with this medium. I do enjoy the shiny, smooth blackness that it leaves. I believe this is a medium i will definately need to further explore. The symbol is the chinese for 'fish'. The picture in the corner is cut out from an envelope i picked up at 'Grand Asia Market' when visiting my parents in Raleigh.